FREE shipping on orders over $170
Last night I let myself experiment — it didn’t take long and it re-awakened my creativity FOR FUN brainwaves 🥳🧠.
I’d been staring at this gorgeous velvet, and instead of saving it for the “perfect” project, I ripped into it.
Literally.
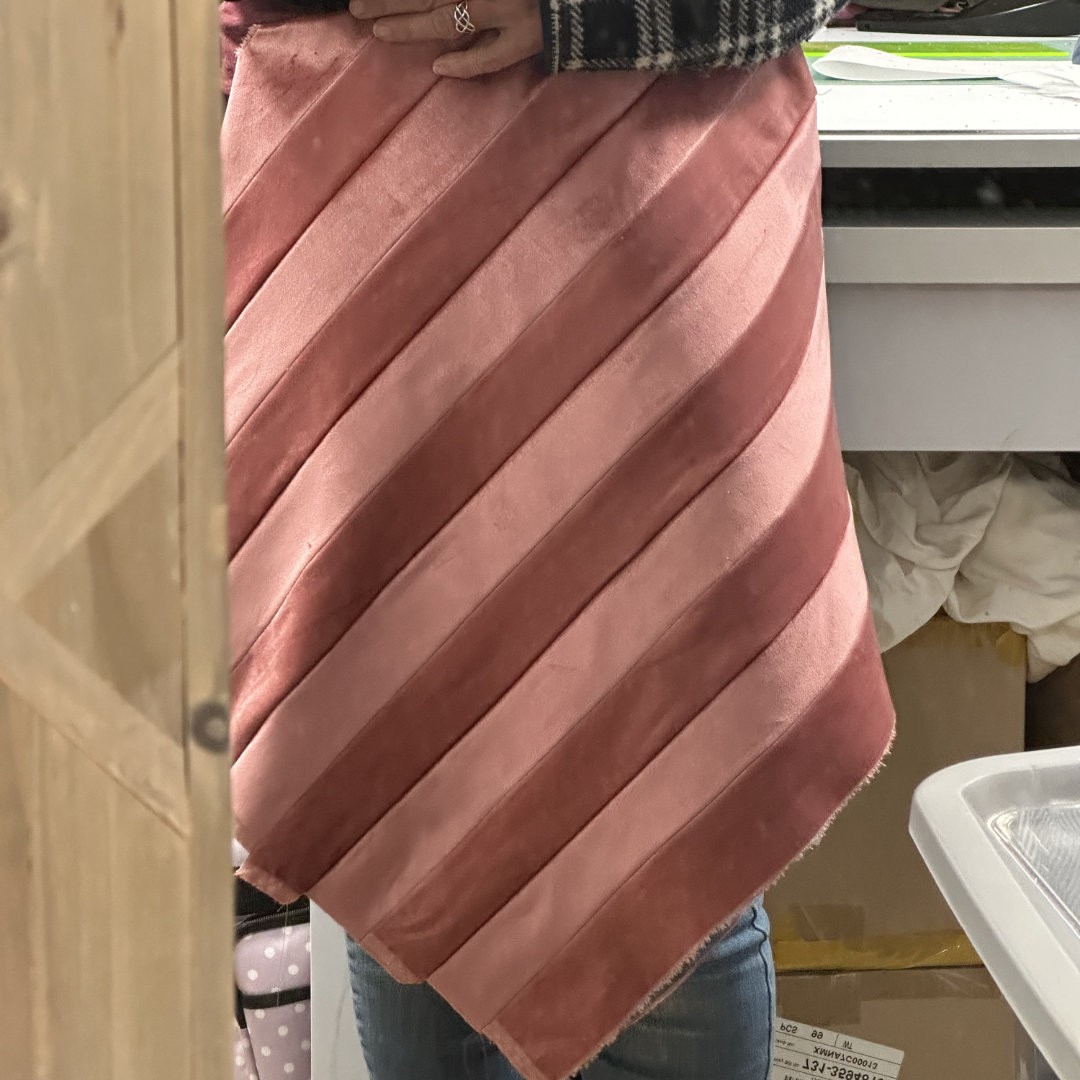
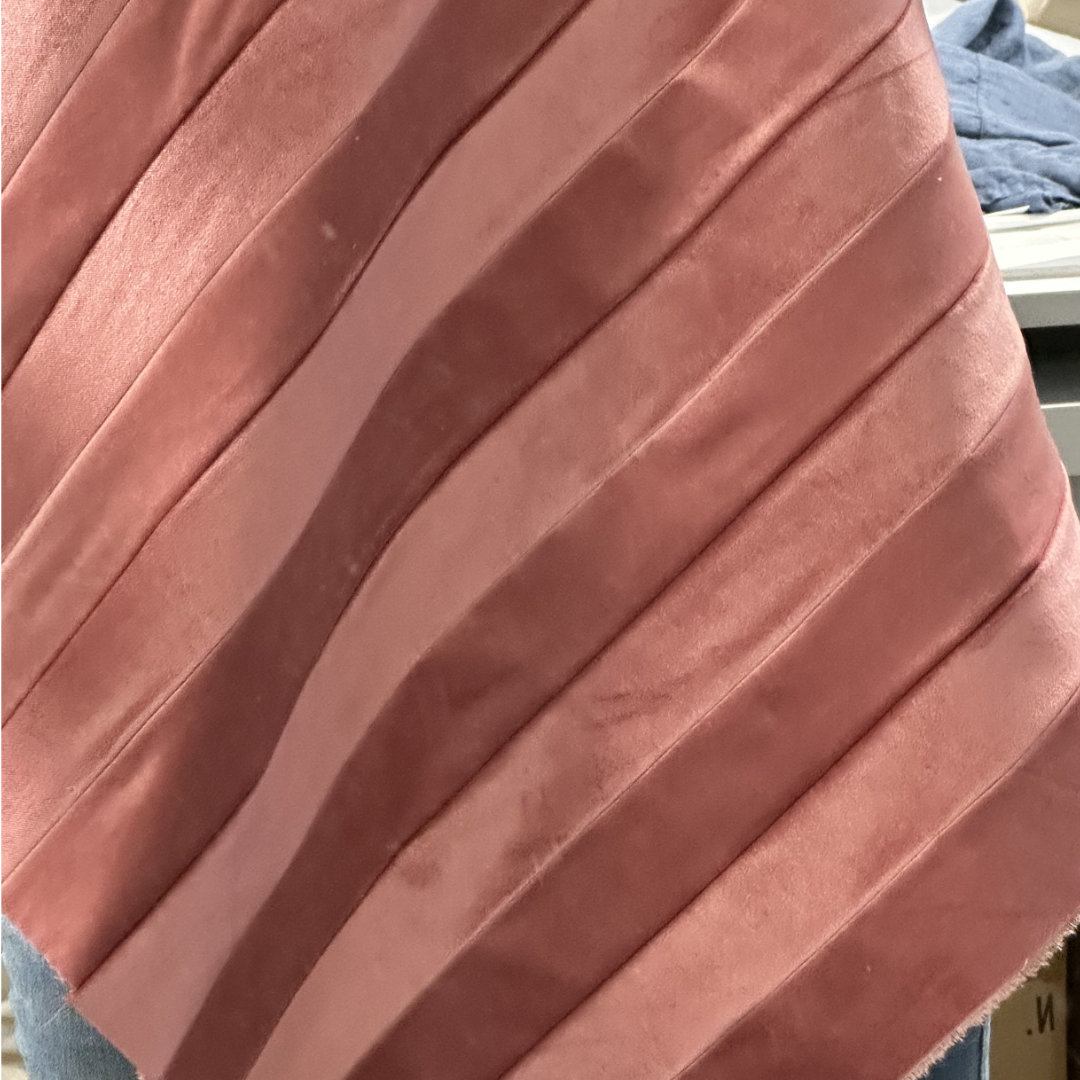
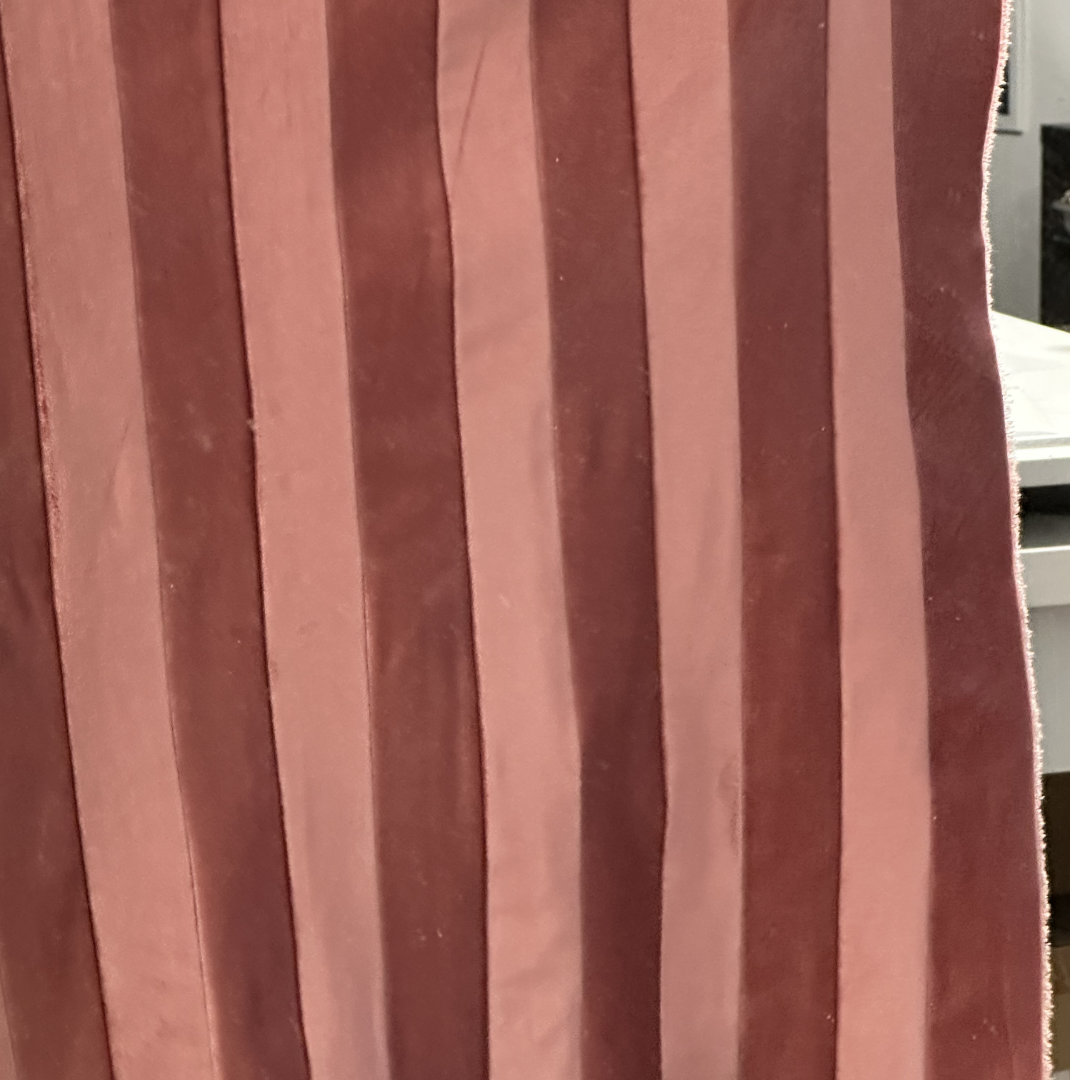
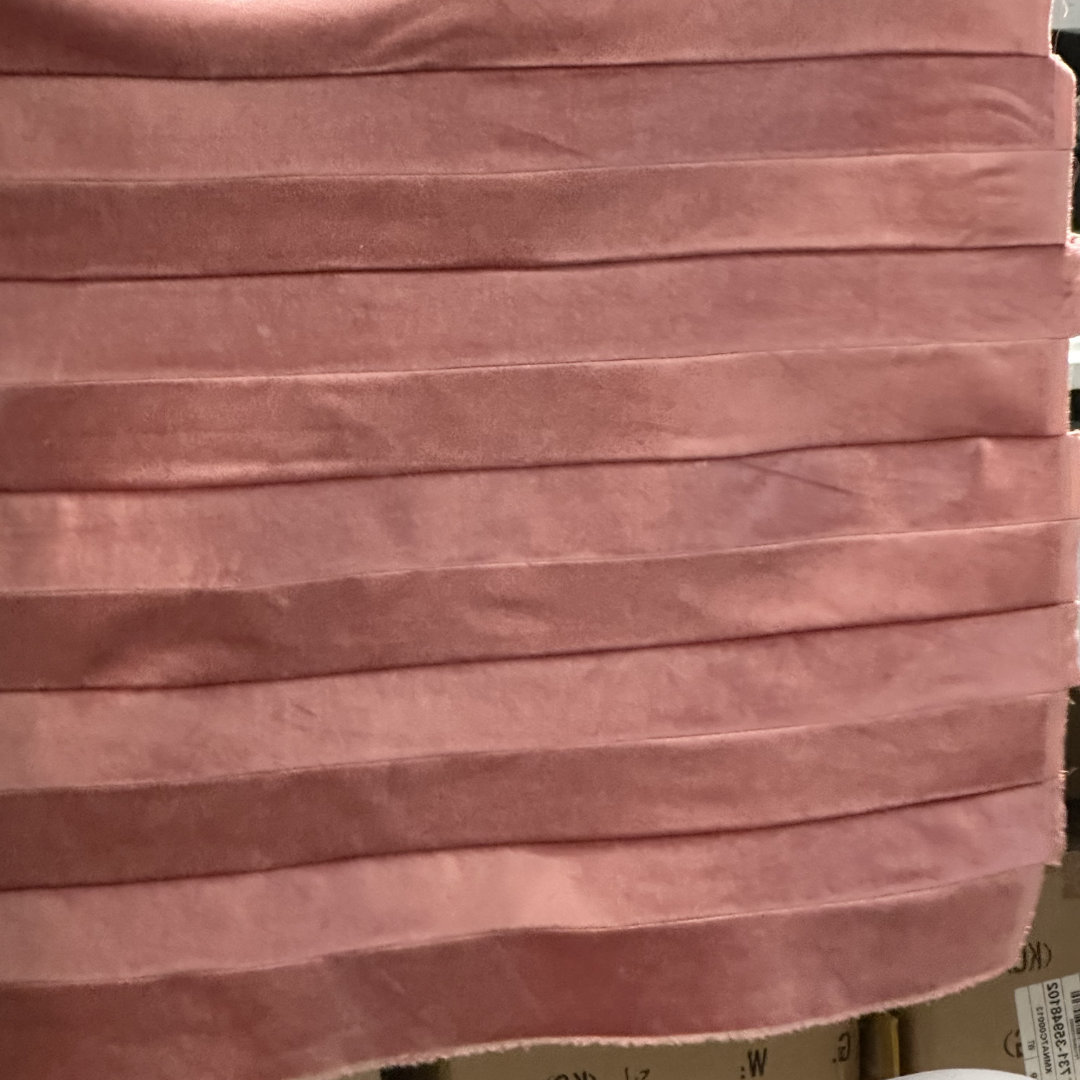
I tore six 6cm-wide strips across the weft, stitched them back together with the nap going in opposite directions, and something super cool happened 🤩🤩
You know how velvet changes in the light? When the nap flips, it’s like the fabric is having mood swings 🤣 — in the best way. Light, dark, light, dark… kind of hypnotic.
Once I’d stitched the six strips, I cut the whole thing in half, flipped one side, and stitched it again. Suddenly, I had this cool square with chevron vibes and so much texture. The light hits it differently on the bias, and the effect is just… I can’t stop touching it 🤩
I had a tiny moment where I thought,
“Am I wasting good velvet just to cut it up and sew it back together?”
But nope. I’m not. This is the point.
This little experiment gave me a big creative boost. It reminded me how satisfying it is to try something without a set plan, to follow the spark, and to see something new come out of it.
And HOW GOOD IS IT!!!!!
I’m now thinking this could turn into a gorgeous bolero with a chevron back — something dramatic and fun to wear over a simple dress or to zhoojh up my jeans.
Yes, I pressed it (from the back). Yes, I did a few “don’ts” when it comes to velvet. And yes — it still looks great!
I’m considering chucking it in the dryer too for that vintage finish, but I haven’t yet decided. I wouldn’t mind dry cleaning this if I do make a bolero, as it is not an everyday thing. Yet 🤣
I wanted to really try something unusual with the velvet — that light-catching, pile-shifting magic that makes it look like a totally different colour depending on how the nap sits.
So I grabbed my scissors (actually, I ripped it — because this velvet tears beautifully on the weft!) and went to work.
Ripped 6 strips, each 6cm wide, straight across the weft.
Stitched them back together, but here’s the twist — I flipped the nap on every second piece. So the pile goes this way, then that way, then back again. (Hello, contrast nap! 👋)
Once stitched, I cut the panel in half widthwise, rotated one half, and joined them again.
The result? A square panel with light bouncing in every direction — especially on the bias.
It’s just so damn good! I am SOOOO pleased with the results 🤩🤩
I’m thinking of turning this piece into a Chevron-effect Bolero jacket. Can you imagine it?
That soft shimmer, that structured shape, and the visual movement from the nap variation… oof.
I can already see it in all three velvet colours — but especially the Bronze. That one’s pure fire. 🔥
• Did I press it from the wrong side? Yes. I’m aware you’re not supposed to iron velvet flat — but you know what? It came out beautifully. I pressed from the back with a full-heat and steam iron, and it came up great!
• Any regrets? Maybe a teeny tiny press mark here or there, but honestly? The nap variation steals the show, so no one’s noticing that.
This is one of those techniques that’s so easy once you get going — but looks like high-end couture when it’s done. Whether you’re using scraps or working with a whole metre, it’s a fab way to:
• Use up narrow offcuts
• Add subtle interest to a simple silhouette
• Learn how to control (and celebrate) nap
Have you ever played with contrast nap before?
What would you make with a nap-flipped velvet panel like this?
Let me know in the comments or DM me your creations — I’m in love with this effect and looking forward to seeing what you think of it.
Let me know if you want a little how-to — or a bolero pattern with a contrast nap feature, because I think I’m onto something… 😏
xx

What product are you searching for?