FREE shipping on orders over $170
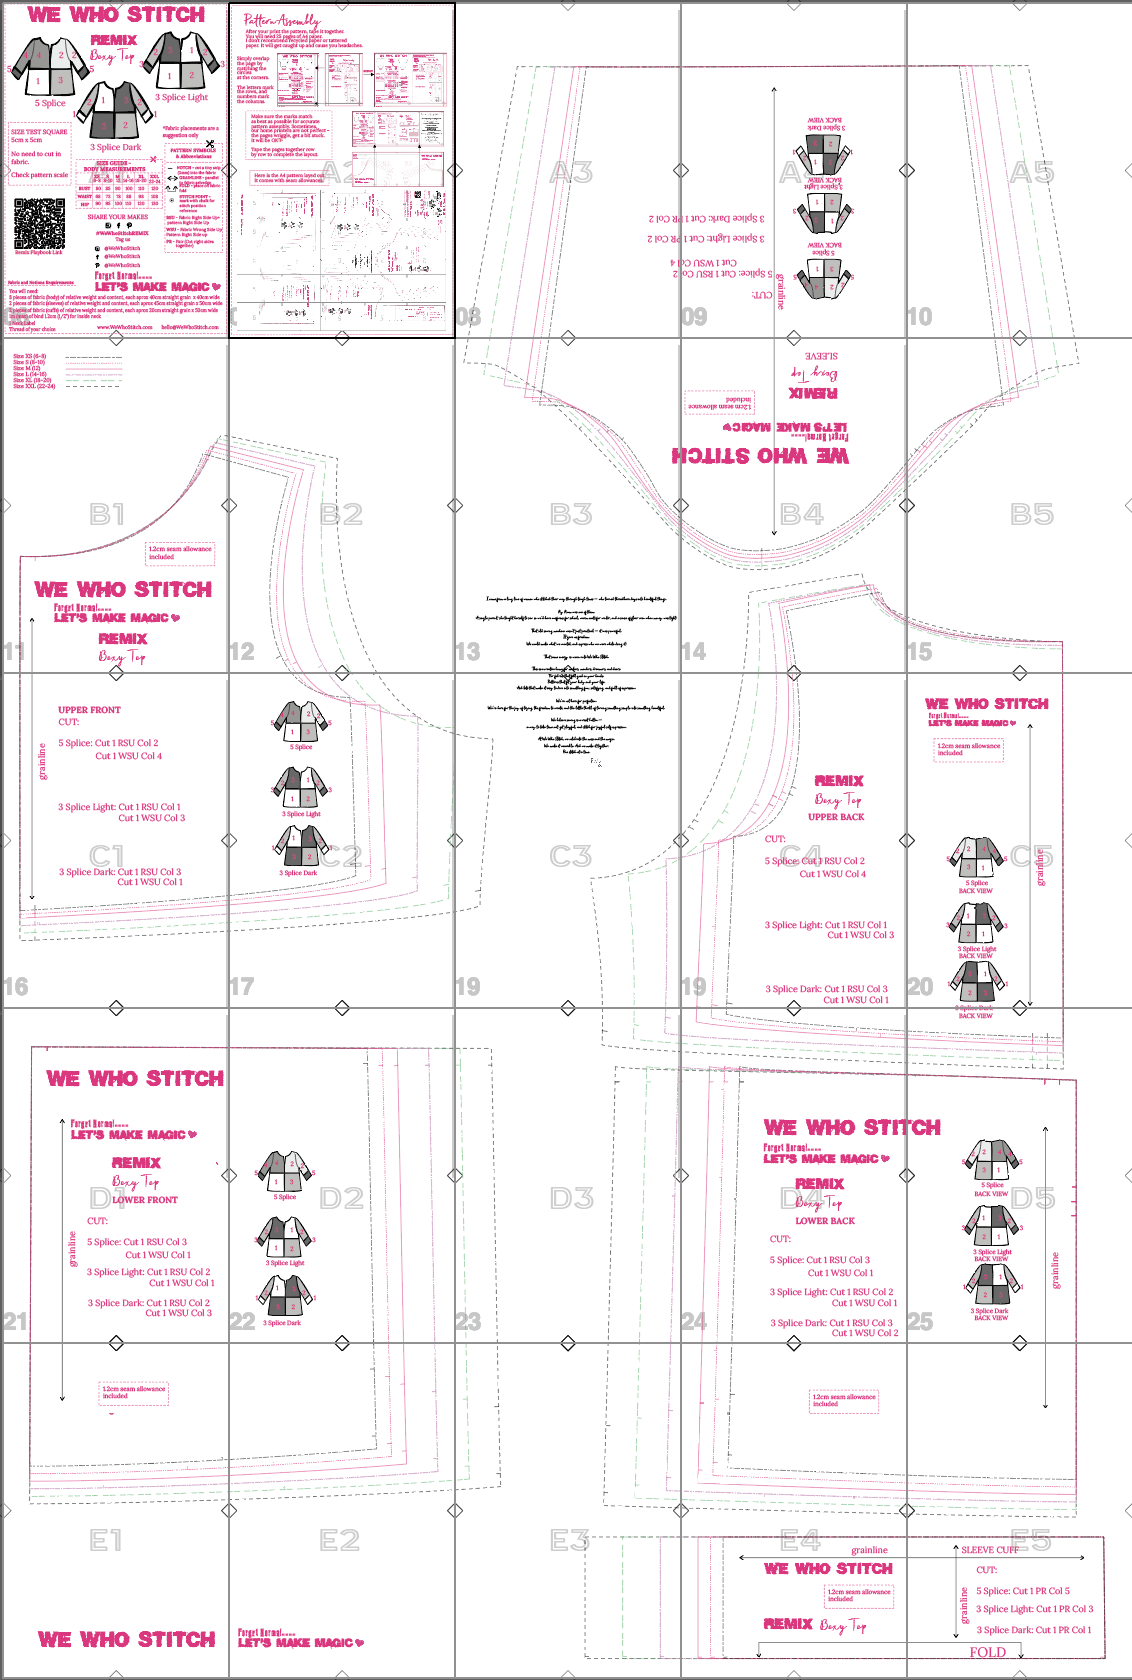
This guide shows you how to assemble an A4 PDF sewing pattern printed at home, including how to line up pages, trim margins, and tape the pattern together accurately.
There are so many wonderful independent pattern labels out there including lots of free options – you never know the quality of what you will get it’s always a great idea to search for photos with the patterns hashtags before you go to the trouble of downloading and assembling an A4 sewing pattern.
I love an instant pattern and getting on with things right now – instant gratification anyone? So I have become a bit of a pro at researching and assembling sewing patterns from the internet. Some people find sticking A4 pages together tedious – but I love that I can have my pattern like RIGHT.NOW🤩
Here are my tips for doing it without giving yourself a headache!:
Tips I have learnt from making these mistakes 😩:
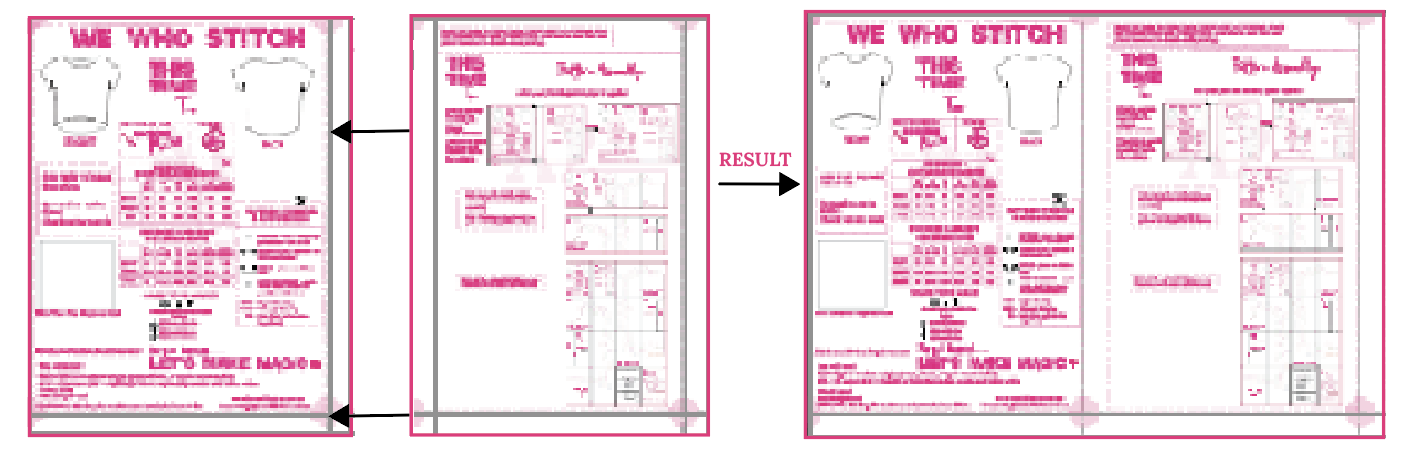
On our We Who Stitch patterns, you do not have to trim the paper – it overlaps 🥳
Match up the lines and circle markers AS BEST AS YOU CAN – we are not performing brain surgery. Don’t stress out if things are a little off. The actual pattern lines matching back together are FAR more important than a slightly wonky marker. Our domestic printers are not perfectionists – they can;t help goping a little off-piste every now and then. Don’t let that give you a headache!
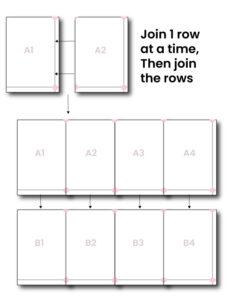
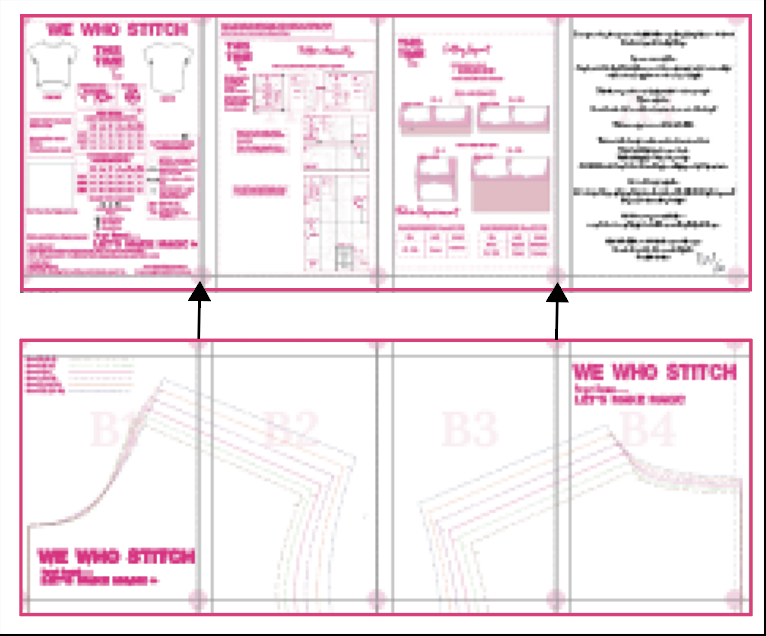
Overlap the page by matching the circles at the corners. The letters mark the rows, and numbers mark the columns.
Tape in the centre just to hold them in place – I tape more fully when everything is in its final place in case I have to make any minor adjustments to make the pattern match. There are a lot of variables in this home printing, instant gratification method of pattern printing. If you are a perfectionist – park that at the door or head to office works and print a large format pattern. If you just want to get cracking and a slight wobble to the pattern is not a problem, go for it!! This is my far prefered method due to my impatience and lack of forward planning 🤪
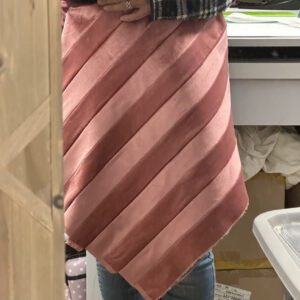
The end result in the images below.

What product are you searching for?